
Winnie the Pooh crochet pattern by wyplatane_po_godzinach
LOW SEW!
Notes:
- This pattern is designed by @wyplatane_po_godzinach
- Please credit and tag me (FB/IG @wyplatane_po_godzinach) if you use this patterns and shares your makes in social media <3
- Please DO NOT copy, sell, redistribute or claim this patterns as your own
- You can sell plushies made using this patterns
- This patterns are written in US terminology and worked in continuous rounds
- Make sure to have the same tension all pattern long or plushie may come out crooked
- If you have any problem with the patterns, don't be afraid to write to me, I will always try to help - FB/IG @wyplatane_po_godzinach
- In patterns are some color changes, so pay attention to the color written before rounds
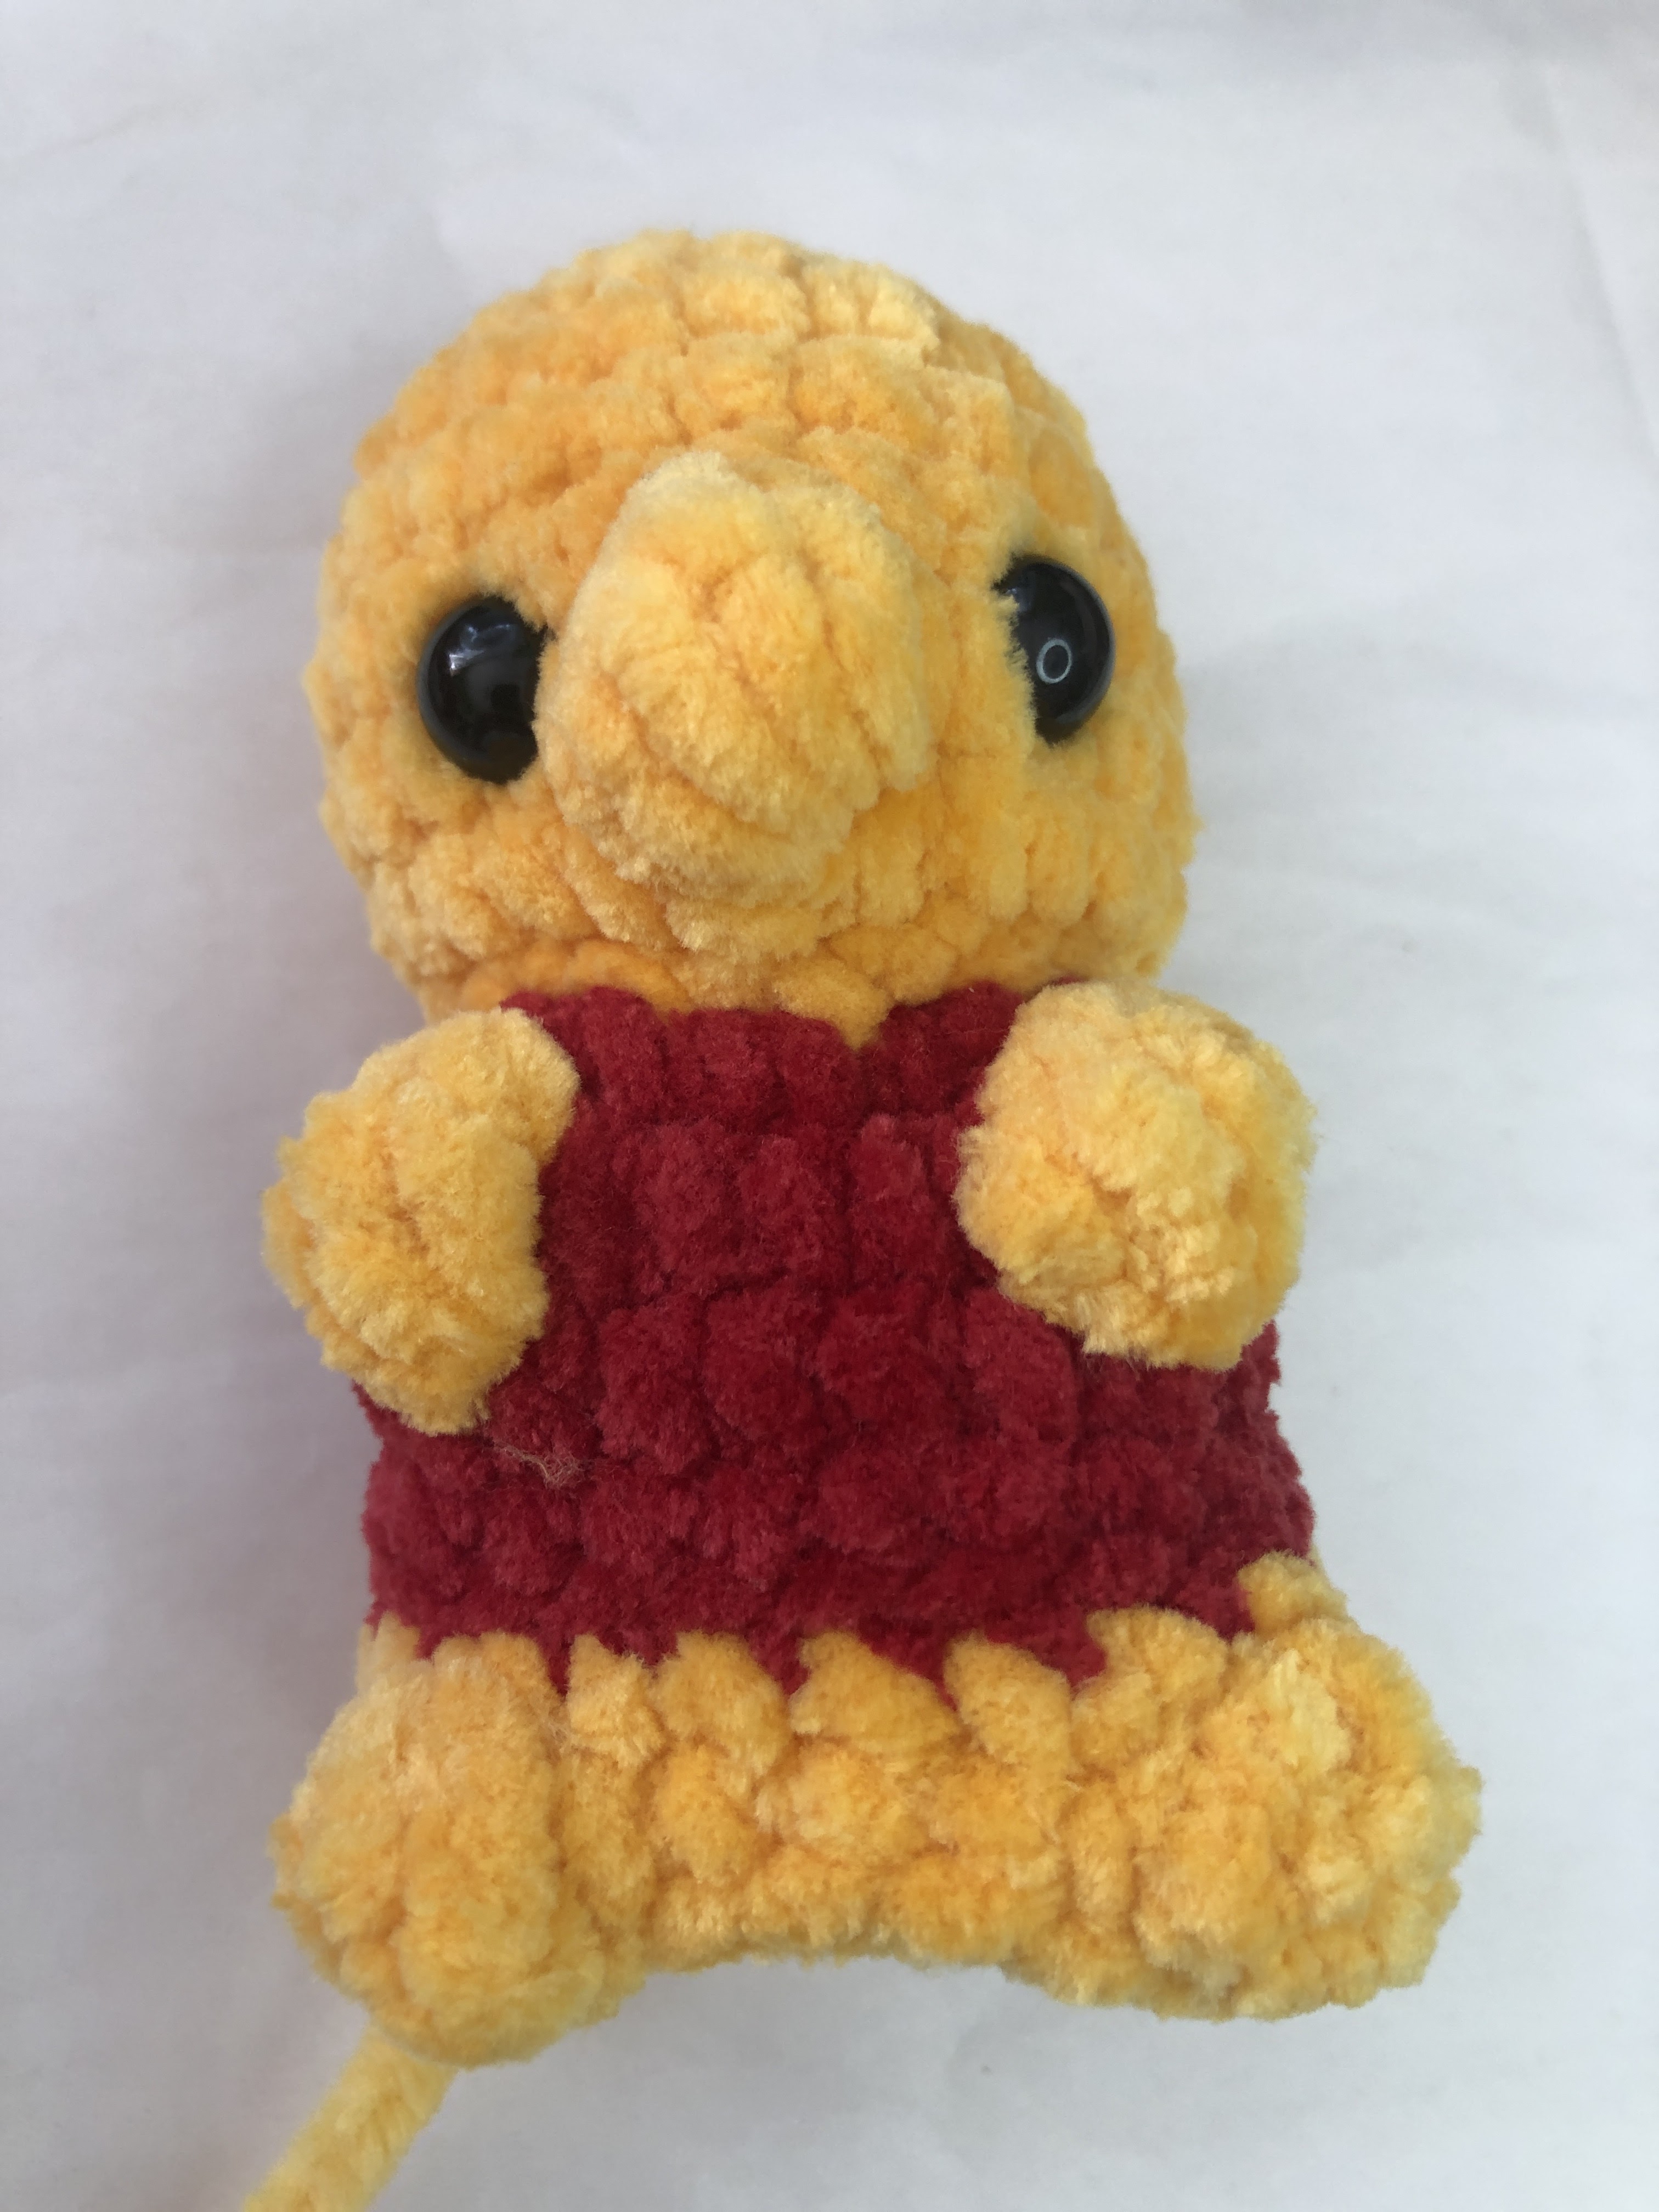
- Mascot made with this patterns will be 18cm long
- DIFFICULTY LEVEL: advanced beginner +
Materials:
- yarn of your choice in two colors, I use luna art baby fox color YELLOW and RED
- 4,5 mm hook (or fitted to your yarn)
- stitch marker
- sewing needle
- stuffing
- safety eyes (I use 10mm)
- scissors
Abbreviations:
- MR – magic ring
- R – row
- ch - chain
- sc – single crochet
- inc – increase
- dec – decrease
- fo – finish off
- slst – slip stitch
- bb – bobble stitch*
*Bobble stitch: 1. Yarn over, insert hook into stitch and pull up a loop. Yarn over, pull through two. Repeat number one in the same stitch/space until you have a total of 6 loops on your hook. Yarn over, pull through all 6 loops at once.
Winnie pattern:
We start with YELLOW
1. 6sc in MR
2. inc x6 (12)
3. (sc, inc)x6 (18)
4. (2sc, inc)x6 (24)
5-6. sc around (24) (2 rounds)
7. 12sc, bb, 11sc (24)
8. sc around (24)
9. dec x12 (12)
Change color to RED
10. inc x12 (24)


Add safety eyes (10mm) between R6 and R7, about 4-5 visible sts apart. Stuff the head.
In the next round we will make legs in YELLOW
11. 10sc, bb, 5sc, bb, 7sc (24)
12-13. sc around (24) (2 rounds)
Change color to YELLOW (cut RED)
14. sc around (24)
If needed move second pair of bb, they should be evenly with the first pair.
15. 11sc, bb, 5sc, bb, 6sc (24)
16. (2sc, dec)x6 (18)
17. (sc, dec)x6 (12)
Stuff the body
18. dec x6 (6)
F.o and close


Ears (make 2):
In YELLOW
1. 7sc in MR
F.o leave a yarn tail for sewing


Komentarze
Prześlij komentarz